Tomb Raider 3 - Boss Fights | |
 |
This page has been created in order to help you out with four bosses in this game. If you have any detailed questions, suggestions or comments, feel free to contact us. |
The text has been written by Tomb Raider Master. |
 |
Tony (Caves Of Kaliya) |
|
Once you crawl out from the crawlspace after the boulder chase in the dark room with the ten cobras, pick up the Small Medipack and the crystal. Before sliding down the ramp, save your game. Then draw your Shotgun.
NOTE: You can also use Pistols, but it's trickier to kill Tony with them and you will need more time.
Slide down the slope and start shooting as soon as you see Lara aiming. You will find yourself in a room with a pool and five platfroms around it. Tony is standing on the central platform and will start laughing when you enter the room. It's very important that you don't stop shooting, especially as you go in. You will need 13-15 bullets to kill him. Also, don't move until he starts shooting fireballs (check the next paragraph below). Keep shooting at him and once he stops laughing, he will send a wave of energy that will turn the water around you into toxic liquid. Don't worry, the wave can not hurt you. After that, he will start throwing fireballs at you, so let's start moving!
When he shoots his first fireball, wait a bit and then run only three steps ahead so as to stop just at the edge. If you were shooting at him all along, he may be already dead, but if he is still alive, keep on shooting. Wait for him to throw his second fireball, then stop shooting and turn left/right. Run two steps and turn to face him again, then start shooting again. Once he throws another fireball, wait a few moments and make a side-flip to the opposite side (right-hand if you ran to the left, left-hand if you ran to the right). When he throws another fireball, wait a bit and then make a side-flip to the opposite side. Keep repeating this process until he stops throwing fireballs and begins to turn over. Then stop shooting. He will explode and leave an artifact behind.
NOTE: You can also kill him with your Pistols and without moving at all: once you slide down take a running jump onto the central platform and immediately crouch. Draw your Pistols and keep shooting at him until he dies. He will throw fireballs, but not a single one will hurt you.
Holster your gun(s) and jump onto the platform on the left. Pick up the Small Medipack and jump to the platform on the right. Pick up the Grenade Launcher and from there jump to the next platform on the right. Pick up the Grenade Launcher Ammo. Now turn around and take a running jump to the central platform. Pick up the Infada Stone to finish the level. | | |
Puna (Temple Of Puna) |
|
Once you slide down the slope, you will find yourself in a large room with a big central platform above a deep pit. There are three steps at the far opposite side with a throne on the highest one. There is an artifact on the throne, too. Puna is sitting there, but he won't attack you yet. First pick up the two Small Medipacks located at the far left and far right side of the platform. Then approach the steps. Stand just on the first half of first step and save your game. Draw your Desert Eagle.
NOTE: You can also use other weapons, like the Shotgun, the MP5 or even your Pistols, but it's trickier and it will take more time. And you will lose even more time during the sequences where Puna calls in poison-breathing lizards (check the next note below).
Stand either on the second half of the first step or on the second step. When you do so, the throne turns around and Puna starts attacking immediately. He is shooting electric bolts and if you get hit once, you are instantly dead, so be careful. You can avoid the bolts by moving or, better, jumping all the time. It is also very important that you don't stop shooting. You will need 20-25 bullets to kill him. It's time to start the fight!
Immediately make a back-flip while shooting. You will land in the middle of the platform. Then make a side-flip left or right. After that, make two side-flips to the opposite side (right-hand if you jumped left, left-hand if you jumped right). Then make another couple of side-flips to the opposite side. Keep repeating this process while shooting at Puna and be sure not to accidentally turn Lara because if you do so, she may jump off the platform and slide down (or jump directly) in the pit when she makes a side-flip.
After some time Puna will stop shooting his bolts, so stop shooting too. He will now fire a green bolt to the left or right side. This bolt can't harm you, but it will cause the appearance of a poison-breathing lizard. While the lizard is around, Puna grows a protective shield around him and you cannot shoot him. So quickly kill the lizard before it gets close. A couple of Desert Eagle hits will take it down. At the same time, Puna's shield will disappear.
NOTE: If you are fast while shooting Puna with your Desert Eagle, you may kill him before he calls any of the lizards. If you are slow or using the Shotgun, he may call a lizard before you kill him and if you are using MP5 or Pistols, he will call a lizard, and then attack you again as soon as you kill it, repeating this process a few times. If any of the lizards poison you, do not use a Medipack because you can kill Puna before your health drains to death, even if you are fighting him with Pistols.
Immediately repeat the previous process, side-flipping and shooting again because he will immediately start shooting his bolts. Keep doing this and eventually he will stop shooting and start shaking. When you see him do that, you can stop shooting. He will explode and leave an artifact behind.
NOTE: You can also kill him without doing side-flips at all: once you slide down in the room run forward and to the left of stairs. Puna will turn around and start shooting his electric bolts immediatelly. Once you reach the throne immediately crouch. The screenshot below shows the right spot:

If you stand at the spot shown in screenshot above, not a single bolt will harm you. Now, draw your Desert Eagle. Wait for Puna to shoot four bolts, then stand up, hop back and immediately start shooting. Puna will shoot his green bolt to cause the appearance of poison-breathing lizard. Once he does that, stop shooting. Wait for lizard to come to you, then kill it with a couple of hits. Immediately turn and start shooting at Puna again, running and crouching at the safe spot. He will turn around towards you and start shooting his bolts again. Keep repeating this process until you finally kill him. You may want to know that doing this way you will loose much more ammo than in the way described above this note.
Very special thanks to Apofiss for this note.
NOTE: The following sequence describes a fight with the least number of used ammo: draw your Desert Eagle, then climb up the stairs as described above and make a back-flip as soon as Puna turns around. Make a side-flip left or right and shoot just two bullets as you leap from the ground. If you do so, you will shoot Puna at the moments when he is not protected by the shield. When you land, make another side-flip at the opposite side, shooting again only two bullets as you leap. After that, make another set of two side-flips, shooting as before. Once you shoot eight bullets, stop and turn to the right. Puna will stop firing electric bolts, turn to your right-hand side and cause the appearance of poison-breathing lizard. Kill it and immediately turn left to face Puna again. Wait just a second, then make the final side-flip left or right and shoot the last two bullets. Once you land on the ground, Puna will start shaking and explode.
You can also, after you shoot Puna with eight bullets, wait a second or two and then shoot him again for two more times, just when he turns to your right. If you shoot at the right moment, you will kill him instantly. Then you don't have to use two bullets on the lizard.
Very special thanks to MMAN for this note.
Holster your gun(s) and climb the steps to the top. Pick up the Element 115 to finish the level.
NOTE: In some versions of the game Puna drops the Ora Dagger and you get the Element 115 when you finish Nevada levels. |
| |
Sophia Leigh (City) |
|
You begin the level in Sophia's office. Go through the door in the far right corner which closes behind you. You will find yourself in an exterior area with ledges leading up on the two sides of a deep pit. As you can see, Sophia is standing on the opposite side, ready to shoot bolts at you. Do not shoot her! She cannot be killed now so don't waste time and ammo on her. Instead you need to chase her to the top and lure her in the trap. So, what are you waiting for?!
Hide behind the ledge ahead and wait until she starts to charge. Then quickly climb onto the left side of the small ramp. Jump to grab the edge, then traverse just a bit to the left. Pull up.
NOTE: The left part of this ledge has an invisible ladder on the side, so you may pull up a little slower from there.
Immediately roll. You will see some handholds above you, but it's faster and safer if you make a running jump with grab instead of jumping up to grab them. Pull up and climb on the low ledge to the left. Turn around, jump and grab the ledge above, then pull up.
Turn right and run across the walkway. Halfway you will find a Small Medipack. Pick it up or leave it for later. Run to the end and push the button to open a trapdoor at the opposite side. Immediately roll and run back across. Turn left and vault onto the ledge.
NOTE: If you go forward and drop down, then turn around, hop back and grab the edge, you will see a crawlspace down to the left. Traverse to the left, drop and grab the edge below and pull up in it. You will find a SECRET Rocket Launcher Ammo and Large Medipack inside. If you decide to go for it, you will have to drop to the floor and climb over again.
Turn around, jump and grab the ledge above. Pull up and walk to the edge. Once more jump to grab the ledge above. Pull up.
You will find a Large Medipack if you follow the short path to the left. Pick it up or leave it for later. Turn right and run across the walkway. Halfway down, there is a Small Medipack. Pick it up or leave it for later. Run and jump to grab the ladder on the left side. Quickly climb to the top.
NOTE: Be sure you don't waste time while climbing up the ladder because Sophia can knock you off with her bolts and send you down to your death.
You will find another Small Medipack on the left side. Pick it up or leave it for later. Crawl below the low ledge to the other side and stand up. You are safe there. Turn around, jump up to grab the ledge and pull up.
Run exactly four steps, jump and grab the opposite ledge, then quickly pull up. Run forward and hide behind the pillar on the left side.
You will see Sophia standing at the walkway opposite you. You will also notice an electric panel on the pillar. Draw your Pistols and shoot it. Its cover will shatter and the walkway on which Sophia is standing will get electrified. Sophia will fall down, explode and leave an artifact behind.
NOTE: You can go now for those four Medipacks and a Secret if you didn't get them earlier.
Do not rush for the artifact! The floor is electrified and if you step on it, electricity will kill you. So you need to turn off the power first. Go right to the end of the walkway from where you came. Turn left and aim for the brown ledge, just to the right of the electrified floor. Hop back and take a running jump on it.
NOTE: If you are not sure where to jump, check the screenshot below:
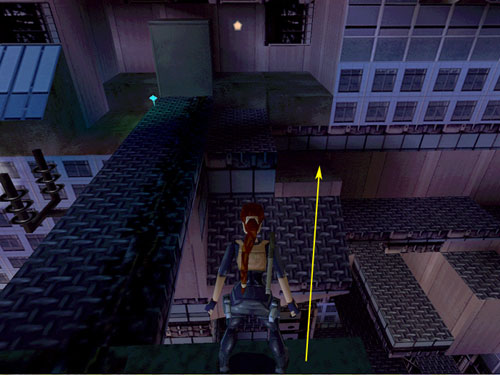
From here pull up onto the ledge in front and turn left. Pull up onto another ledge. Go forward and drop down at the other side. Turn around and push the button to turn off electricity. Then turn right and step on the walkway Sophia was standing a minute ago. Pick up The Eye Of Isis to finish the level. |
| |
Doctor Willard (Meteorite Cavern) |
|
The level starts off immediately, so take a few seconds to get acquainted with the terrain. There is a circular walkway with a lava pit in the middle. Above this pit is a meteorite. There are also four long hallways starting from the central one, each one of them leading to one of the four artifacts with four lava pits separating them. At the opposite side, you can see Willard transformed into a big, ugly, spider-ish monster and ready to attack.
He will start following you around the circular walkway immediately. You cannot kill him as long as the artifacts are in its places, because this makes him immortal. So you will need to pick up all the artifacts first. Like all bosses, he has a weakness: he can be stunned for a small amount of time if you shoot him enough times, and you have the time to run and grab one artifact at a time before he wakes up again. Let's start moving!
Immediately save your game and draw your Desert Eagle.
NOTE: You can also use other weapons like the Shotgun, the Uzis or even Pistols, but its trickier to kill him with these weapons. It will take you more time with the Shotgun and much more time with the Uzis or Pistols.
Start running in the same direction with Willard (if he is moving clockwise, run clockwise; if he is moving counterclockwise, run counterclockwise). Always keep the same distance from him. An ideal distance is half a circle. Make running jumps to cover the straight parts of the walkway (between the side-hallways) more quickly. If you get too close behind him, he may jump and turn around in mid-air, then move towards you. So be careful, because he can cause you damage if he touches you and he may also push you in any of the five lava pits.
Keep running and jumping, then stop and shoot him a few times. When he gets closer, start running again, jumping a whole circle, then stop and start shooting once more. You will need about 10-12 bullets to take him down, so once you shoot 8-9 bullets continue running in the same direction, until you are in front of the closest side-hallway. Then, turn your back to this side-hallway and shoot a few more bullets to Willard. Save your game immediately as you see him freeze.
NOTE: The situation described above is shown in the screenshot below:

Then roll or make a back-flip with a mid-air twist in the side-hallway and sprint towards the artifact. Stop sprinting as you are getting really close, run and quickly pick it up. Immediately roll or make a back-flip with mid-air twist, then sprint back and continue running in the same direction you ran before. If you are fast, Willard won't awaken until after you return back to the central walkway.
NOTE: Be sure that you do not hesitate at all. If you are slow or if you accidentally get stuck at any point, Willard may shoot his bolt at you upon awakening and once he shoots it, you cannot escape from it and it will kill you instantly!
Continue running and repeat the whole process three more times to get the three remaining artifacts. From the starting position, the location of each one is the following:
» The Eye Of Isis - left
» Infada Stone - right
» Ora Dagger - straight
» Element 115 - back
Once you pick up the last artifact and return, you will see the meteorite falling into the central lava pit. Willard is now vulnerable, so keep on with the running-jumping-shooting process until you finally kill him for good. |
| |