Tomb Raider 3: Adventures of Lara Croft Walkthrough & Game Guide
SOUTH PACIFIC: Temple of Puna
*(We count only one lizard at the end of the level.)
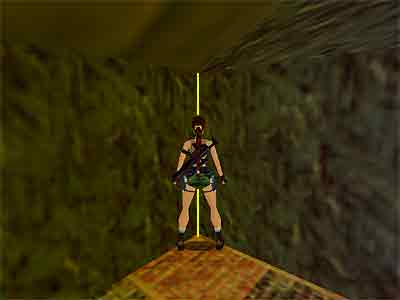
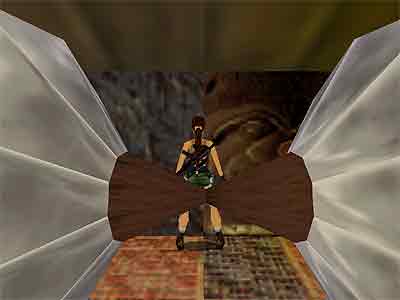
As soon as the level begins, use the Look button to locate the two tribesmen above the slope on the right hand side. Kill them both and if their darts hit you, do not take a Medi Pack. Take a standing jump over the slope and go up the steps with your weapons drawn. Kill a third tribesman that climbs down the blocks and climb up the blocks he came from. Head up the steps and kill a fourth tribesman, who also blows darts (if you are a PC player, do not take a Medi Pack, as you are about to get a Crystal). At the end of the steps, crawl through the opening and follow the passage to reach a ledge above a slope. Pick up the Small Medi Pack. (Note - You can avoid getting hit by the tribesmen's arrows if you do the following: Shoot the first ones before going up the stairs, not forgetting to side-jump to the left and right. For the third tribesman, start going up the stairs carefully, with your guns drawn. As soon as Lara aims, start shooting whilst jumping backwards. Climb a few steps again and wait for Lara to aim. Then immediately jump back and shoot until he dies. For the fourth one, go up the stairs until the bend. Immediately draw your guns and start jumping backwards, being ready to shoot at the tribesman who will very soon approach. Do not back up too much though because he will not follow you for long. You will need to go up the steps again to lure him. Shoot him whilst back-jumping and eventually he will fall. You can even kill them all with Pistols this way.) Room with rolling blades - In the next room, you can see the six rolling blades. There are also four buttons (two on each side) that you need to push in order to open the exit gates. So, you need to use the four buttons, avoiding the blades at the same time, which, if they do not cause your death, they can get a lot of your health. To deal with the blades, you do not need to run like a madman. Stand above the slope and wait for the blades to pass to the right. Slide down, get the Crystal and run up the ramp on the left hand side, heading to the one of the two corners. Stand in the corner (as shown in this screenshot) and wait for the blades to come. They will not hurt you, so as soon as they roll away, press the first (nearest) button and return to the corner. When they come and leave again, run to the other corner and follow the above procedure for the second button. Alternative method - As soon as you run up the ramp, position Lara in front of the line that separates the tile with the button from the next one (take a look here to see the spot). When the blades approach, they will not hurt her. When they leave, side-step towards the button and press it. Immediately sidestep to the safe spot again. When the blades approach and leave again, side-jump twice to land in front of the line that separates the tile with the other button from the dark tile of the wall. Wait for the boulders to approach and as soon as they leave, side-step towards the button and press it, and then side-step to the second safe spot. Turn around and wait for the boulders to leave. You now need to reach the exact opposite side of the room in order to use the remaining two buttons. When the blades roll away, stand almost at the top of the ramp between two tiles (the line that separates two tiles should be between Lara's legs). When the blades are ready to reach you, take a standing jump over the wooden part, where the blades are connected. Sprint to the other side of the room and stand in the corner. Alternative method - As soon as the boulders roll away, start running behind them to reach the even part of the floor (between the two ramps). Stand a bit close to the slide on the right and when the boulders start rolling towards you and are about to reach you, side-jump to the right to land on the slide. Keep holding the Jump button, so that Lara, as soon as she lands on the slide, jumps up again to land back on the even part of the floor behind her, whilst the boulders have already rolled past this part. Immediately run up the ramp to reach the buttons. Follow the "corner" or "the line that separates the tiles" procedure for the last two buttons. Room with spiked ceiling - Once you are done with the buttons, the gates open. Sprint through them and climb on the block. Slide to the room below and quickly pull the movable block out of the wall (it is the one with the different tile in the far left corner). This will stop the spiked ceiling from descending and you can freely throw the three switches that open the gate. Or, if you are up for a challenge, it is actually possible to pull all three switches and get out of that room on time before the spiked ceiling gets at you, without pulling out the block. You have to be very quick and precise in your movements and you may need a little practice. Before sliding down, turn to face the room with the rolling blades and position Lara on the left side of the ledge (in approximately the middle of the edge). Start sliding and press Action to grab the edge. Release and she will land in front of one of the switches. Now you have to be more than fast. Immediately throw the switch and turn about 45 degrees to the right to make Lara face diagonally the switch on the right. Dash to it and throw it. Immediately roll and turn about 45 degrees to the left to face diagonally the last switch, that is on the right wall by the door. Dash to it, throw it and run out the door. If you did it right and did not waste any time at all you will be out just in time and absolutely safe. Once you open the gate, go through it and safely drop down. Slide down and pick up the Small Medi Pack. Go to the left and throw the switch to open the gate on the other side of the room. Save your game here in case you will not make it the first time. Turn around and start running. The boulder starts rolling after you pass over the grayer tile in the middle of the room. Start sprinting and if you want press the Look button to cut the camera that changes the view, showing the boulder. When you pass through the gate, cut to the right because another boulder rolls from the left. Get the Crystal on your way and sprint through the archway where you are safe. [Note about the Crystal (PC version) - The PS players can take the Crystal whilst sprinting. The PC players may not want to take it whilst sprinting. When you enter the second room, cut to the right and run above the breakaway tiles, turning left a bit to enter the archway. The boulder will stop above the Crystal but you can get it by crawling. That way, if the following tribesmen hit you, you can heal yourself without getting a Medi Pack.] You are back where you started the level. Three tribesmen that blow darts are waiting for you - one from the right and two from the left. Kill them and do not forget to back up and jump a lot whilst shooting. Take a standing jump above the slope on the left to get a Small Medi Pack that one of them dropped. Secret - Go up the steps as you did when you started the level and climb up the blocks. Follow the steps around to the top close to the crawlspace. Take a standing jump to grab the carved wall opposite the crawlspace and shimmy to the left. There is an open door that was previously closed. Pull up and enter the room. Pick up the Flares, the Large Medi Pack and the three sets of Desert Eagle Clips (or the Desert Eagle Gun if you do not have it, instead of one of the sets of Clips). Safely drop down and make your way back where you killed the tribesmen before. (Note - If the door to the Secret is not open, make sure you have got the above Crystal. The square beneath the Crystal carries the trigger for the door.) End boss - Head forwards and go through the gate on the other side. Slide down the ramp to enter the throne room. Pick up the two Small Medi Packs at the end of the walkways and (if possible) save your game. When you reach the second step, the throne turns around and Puna appears sitting on his throne. Yes, you need to kill Puna, avoiding the energy bolts he throws. Immediately jump backwards once to stand in the middle of the room having the walkways to your left and right. Start shooting, side-jumping at the same time. From the middle of the room, side-jump twice to the right, then twice to the left to find yourself back in the middle of the room. Again side-jump twice to the left, then twice to the right back to the middle of the room. This is a good method to avoid Puna's bolts. Puna though puts up an energy shield and releases a lizard. You know he is about to release a lizard when you see him releasing a thin line of green light towards one of the sides of the room. At this point, stop shooting at Puna (because the shield protects him) and kill the lizard. Depending on the power of your weapon, Puna may release more than one lizard. So, you may want to use a powerful weapon (like the Desert Eagle) in order to finish him off quickly. You can even kill Puna with your Pistols, but it will take more time and you will have to deal with more lizards in the process. If you choose to do it with Pistols, remember to jump up to avoid the poison breath, and have in mind that, apart from breathing poison at you, the lizards may try to push you off the platform. When you see the throne to vibrate, you know that you are done. Stop shooting and Puna will explode. Go up the steps and pick up the Ora Dagger to end the level. (Note: In some versions this will be the Element 115. You will get the Ora Dagger at the end of Nevada levels.)
|
||
| Index | ||
| Jump to location: | ||
| NEVADA: Nevada Desert | LONDON: Thames Wharf | ANTARCTICA: Antarctica |
| We would like to thank Nicky for her help. Many parts of this walkthrough would not have been written without her participation. | ||
Tomb Raider 3: Adventures of Lara Croft Walkthrough & Game Guide © 2000-2007 www.tombraiderhub.com |
||